What to Expect During a Professional Dental Cleaning in Petersburg, VA
Professional dental cleanings are routine preventive procedures designed to keep your teeth and gums healthy. This guide walks you through each step of the process — from the initial exam by a hygienist, to scaling (tartar removal), polishing, flossing, and possibly fluoride treatment. We also cover what to do before and after your appointment, how often to schedule cleanings, typical costs, and how to manage anxiety. Local context is included for Petersburg, VA (near Fort Lee, Downtown Petersburg, Colonial Heights, etc.), and helpful FAQs address common patient concerns. Throughout, we link to Southside Dental Care’s own pages on gum care and cavity prevention and cite authoritative sources (ADA, CDC, Cleveland Clinic) to provide accurate, fear-reducing information.
Why Dental Cleanings Matter
Regular professional cleanings remove plaque and hardened tartar (calculus) that daily brushing and flossing can miss. Removing these irritants is crucial for healthy gums; as Southside Dental notes, “regular cleanings remove plaque and tartar that brushing cannot — especially along the gumline”. Cleanings help prevent cavities (tooth decay) and gum disease, both of which are largely preventable with good care. The CDC recommends having “at least a yearly dental check-up and professional cleaning” as part of good oral health. (Many dentists, including here in Petersburg, often suggest every six months for most patients.) Your cleaning visit will also include an exam: the hygienist or dentist checks for early signs of problems like decay, gum inflammation, or other issues so they can be treated early.
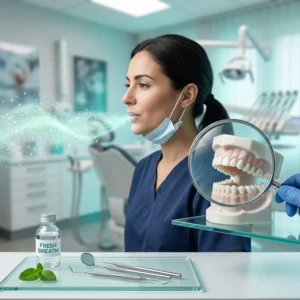
Figure: A dental hygienist performs a routine cleaning (scaling) on a patient’s teeth. This is typically gentle and quick, though you may hear scraping noises.
Before Your Cleaning: Pre-Visit Checklist
To get the most out of your appointment, a few simple preparations help: – Brush and Floss: On the morning of your visit, brush your teeth for two minutes and floss your teeth as usual. (This removes extra plaque so the dentist can see problem areas, and it helps you feel more comfortable, too.)
– Eat & Medications: Unless your dentist advises otherwise, have a light meal before your visit. If you take medications, take them as prescribed. If you opt for sedation (e.g. nitrous oxide), follow any fasting instructions given.
– List Concerns: Write down any symptoms or questions you have (bleeding gums, sensitivity, etc.) so you remember to discuss them. Also bring your medical history or medication list, and any dental insurance/ID card.
– Arrive Early: Plan to arrive about 10–15 minutes early. You may fill out forms or confirm your info. This helps avoid rushing and reduces stress. – Relaxation: Practice calm breathing or listen to calming music on the way. Tell the staff if you have special needs or anxiety — communication is key. As Cleveland Clinic advises, if you’re nervous let your dentist know; many practices (like Southside Dental) offer sedation options to help you feel calm.
The Cleaning Process: Step-by-Step
During the cleaning, you are in the care of a dental hygienist (a trained professional) and possibly the dentist. Here’s what generally happens, in order:
1. Oral Examination (Initial Check)
The hygienist will begin by examining your mouth. Using a small mirror and dental probe, they check teeth surfaces and gums for any visible issues or areas of concern. They may gently feel around your teeth and gums to measure pocket depths (spaces between gums and teeth). If anything needs a closer look, the hygienist notes it. In some offices, X-rays may be taken either before or after cleaning if you are due for them, to look between teeth and at roots. This exam ensures it’s safe to proceed and identifies any needed treatments.
2. Scaling (Tartar Removal)
Next comes scaling, the main cleaning step. The hygienist uses special instruments to remove plaque and hardened tartar. Often they start with an ultrasonic scaler — a vibrating tool that gently chips off tartar while a water spray flushes away debris. (You will hear a buzzing or scraping sound, but it shouldn’t hurt.) If needed, hand scalers and curettes (metal tools) are used to reach tight spots between teeth and below the gumline. The hygienist systematically cleans all tooth surfaces, especially near the gums and between teeth where buildup hides. For very heavy tartar, this may take extra time and effort. Scaling usually feels like light scraping or vibration against the tooth; if you feel sensitive, let your hygienist know — they can adjust pressure, use a numbing gel, or pause for breaks.
3. Polishing
After tartar is removed, the hygienist polishes your teeth. They switch to a rubber cup or brush on a handpiece, with a slightly gritty prophylaxis paste (tartar-removing polishing paste). As the cup spins, the paste gently buffes out surface stains from foods and smoking, leaving teeth smooth and shiny. This step typically lasts a few minutes and feels like a vibrating rubber cup moving over your teeth. Though you might taste the minty paste or feel a tickle, polishing should not hurt. It removes plaque or stains left after scaling. The hygienist often lets you select the paste flavor (mint, cinnamon, etc.) to make it more pleasant.
4. Flossing and Rinsing
Next, the hygienist will floss your teeth thoroughly. Professional flossing removes any remaining paste or debris from between teeth. It also serves as a final check: the hygienist can use floss to detect any areas where plaque is still hiding or where your gums are tender. They might give you feedback on technique or note spots to focus on at home. Finally, you’ll rinse your mouth with water or an antibacterial rinse. This clears out any loosened plaque and polishing paste. Some offices use an antiseptic rinse to leave behind a clean feeling, or they may apply a fluoride-rich water spray to neutralize acids.
5. Fluoride Treatment (Optional)
Many dentists offer a fluoride treatment at the end of the cleaning, especially for children or patients prone to cavities. If included, a sticky fluoride gel or foam is applied to your teeth, or a fluoride varnish is painted on. You’ll bite on a plastic tray filled with gel for a minute or two, or the hygienist will coat each tooth with varnish. Fluoride helps strengthen the enamel and prevent decay. (If applied, don’t eat or drink for about 30 minutes afterward so the fluoride can fully absorb.) The cavity-prevention experts at Southside Dental note fluoride as a key preventive step.
6. Final Dentist Check and Recommendations
After the hygienist finishes cleaning, the dentist usually comes in for a quick exam. They’ll check your overall oral health, review X-rays if taken, and discuss any findings. For example, if the hygienist noted early cavities, gum inflammation, or suspicious spots, the dentist will explain them. You’ll get personalized advice: maybe a recommendation for more frequent cleanings (if you have gum issues), or gentle reminders about brushing/flossing habits. The dentist may take a final look at your bite, check restorations (fillings, crowns), and answer questions. Then you’ll be guided to schedule your next appointment. Most people are told to return in about six months, though this may vary if you need additional care.
Instruments & Sensations
Common tools used include:
– Mouth mirror & probe: For examination.
– Ultrasonic scaler: Vibrates to break up tartar, sprays water. You’ll feel a gentle scraping/vibration and hear high-pitched humming. This is normal.
– Hand scalers (curettes): Sharp metal tools to fine-tune cleaning. You may feel scratchy scraping.
– Prophy cup & paste: Rubber cup on a slow-speed handpiece with gritty paste. You feel buffing on tooth surfaces.
– Dental floss: Slides between teeth to remove debris; you may feel a bit of pressure.
– Saliva ejector (suction): Small vacuum tip keeps your mouth dry. You might feel it lightly against gums and cheek.
– Air/water syringe: Sprays water or air to rinse and dry teeth. This may feel cool or wet.
After the cleaning, teeth will feel very smooth and clean. It’s common to have some sensitivity to hot, cold, or sweet foods for a day or two. Your gums might be a little tender or even bleed slightly when you floss for the next day. This is normal as gums heal from cleaning. Over-the-counter pain relievers (Tylenol/Advil) can ease any soreness.
Post-Cleaning Care: Do’s and Don’ts
After your appointment, follow these simple guidelines for the best results and comfort:
– Do brush gently twice a day and floss daily. After a cleaning, it’s important to maintain the clean surfaces.
– Do use a soft-bristled toothbrush for a day or two if your teeth feel sensitive. Consider toothpaste for sensitive teeth.
– Do drink plenty of water and resume a normal diet after 30–60 minutes. A nutritious meal helps your body support gum healing.
– Do chew sugar-free gum with Xylitol if allowed; it stimulates saliva and protects enamel.
- Don’t smoke or use tobacco for at least a day. Tobacco can irritate sensitive gums and counteract the cleaning.
- Don’t skip brushing or flossing for the rest of the day. In fact, be extra thorough with home care tonight and tomorrow to keep your teeth plaque-free.
- Don’t eat hard, crunchy, or sticky foods immediately if your gums are sore; stick to soft foods and cut food into bite-size pieces.
- Don’t consume staining substances (coffee, tea, red wine, berries) heavily for 24 hours if your teeth were polished, to keep the newly clean teeth bright.
Contact your dentist if you experience severe pain, prolonged bleeding, or any unusual reaction. Minor sensitivity and gum soreness are expected and usually go away within a day or two. The hygienist or dentist may give you a “home instruction” handout; follow any specific advice they give.
How Often to Get Cleanings
Most healthy adults benefit from a professional cleaning twice a year (every six months). This semi-annual schedule helps prevent plaque from building up to hard-to-remove tartar. The CDC’s recommendation of at least yearly cleanings is a minimum; dentists typically personalize intervals. For example, if you have gingivitis (gum inflammation) or a history of cavities, your dentist may suggest visits every 4–6 months. Conversely, if you have excellent oral health and hygiene, and low risk, you might possibly stretch to annual visits (though many still prefer 6-month recalls). Always follow your dentist’s guidance on frequency.
Typical Appointment Duration
Plan on spending about 30 to 60 minutes at each cleaning visit. The exact length depends on how much cleaning is needed (heavy tartar requires more time) and whether you have X-rays or a thorough exam. Simple routine cleanings are often closer to the 30–45 minute range, while appointments involving fluoride, X-rays, or minor treatments can approach an hour. Budget for some wait time or paperwork too.
Cost of a Cleaning (Petersburg, VA)
Cleaning costs vary by location and dentist. In the Petersburg/Richmond area, the typical range for a routine adult prophylaxis cleaning (without insurance) is roughly $75 to $200. (Nationally, estimates range from about $50–$350 for uninsured patients.) Most dental insurance plans, however, cover two preventive cleanings per year at 100%, meaning you likely pay nothing out-of-pocket for a regular cleaning and exam. (Check your plan: Southside Dental’s office can verify benefits for you.) Specialty cleanings (see below) often cost more. Note that prices can be higher at specialist offices or if you require more advanced cleaning. Always call your Petersburg dentist to confirm fees, and ask about any available discounts or payment plans if needed.
Types of Dental Cleanings
| Feature | Routine Cleaning (Prophylaxis) | Deep Cleaning (Scaling & Root Planing) |
| Purpose | Preventative: remove plaque/tartar from above gumline for healthy mouths | Therapeutic: remove plaque/tartar above and below gumline to treat gum disease |
| Performed by | Dental hygienist (general dentist oversee) | Usually hygienist, under dentist or periodontal specialist supervision |
| Anesthesia | Not needed (treatment is comfortable) | Often requires local anesthetic numbing (due to deeper cleaning) |
| Number of Visits | 1 visit (per session) | Often 2+ visits (one per mouth quadrant), per deep cleaning session |
| Frequency | Typically every 6 months | As recommended after diagnosis of gum disease, sometimes every 3–4 months for maintenance |
| Cost (Approx.) | Lower (generally covered 100% by insurance) | Higher (more chair time; may be partially covered) |
| Common Findings | Mild gingivitis, no bone loss | Periodontal pockets, bone loss, advanced gingivitis |
| Aftercare | Normal sensitivity, routine care | Deeper soreness and sensitivity for days, may need special rinse or antibiotics (see ADA) |
Routine cleanings (often simply called “cleaning and exam”) are what most patients need at regular checkups. If your dentist finds evidence of gum pockets or tartar below the gumline, they may recommend scaling and root planing (a “deep cleaning”). This involves the same principles of scaling and polishing, but it is more intensive and usually done over several visits with numbness, so that the roots of the teeth can be fully cleaned and smoothed.
Managing Anxiety and Comfort (Fear Reduction)
It’s common to feel anxious about dental cleanings. Here are ways to reduce stress and communicate with your hygienist:
- Talk About Your Fears: Before or during the appointment, tell your hygienist or dentist if anything worries you (pain, needles, a gag reflex, etc.). Hygienists are trained to be gentle and will adjust their technique. “Speak up if something hurts” — they can apply a topical numbing gel or pause if needed.
- Ask Questions: Understanding each step can make it less scary. Don’t hesitate to ask the hygienist “what is that tool?” or “what will happen next?” as they go, and they will explain. Knowing what to expect (scraping sound, saltwater rinse, etc.) often reduces fear.
- Use Breaks & Signals: Agree on a hand signal (like raising your hand) to take a quick break during cleaning if you need one. Small breaks can relieve tension.
- Sedation Options: If anxiety is severe, talk to the dentist about sedation. Nitrous oxide (“laughing gas”) is a very safe sedative inhaled through a small mask; it relaxes you during the procedure and wears off quickly. The ADA confirms that inhaled nitrous oxide is a safe, effective way to manage anxiety in dentistry. Oral sedation (a mild pill) is another option, but requires planning (you’ll need someone to drive you home). Southside Dental Care in Petersburg offers sedation dentistry for nervous patients— just let them know in advance if you’re interested.
- Relaxation Techniques: Practice deep breathing or listen to soothing music through headphones during the cleaning. Some offices allow you to watch TV or listen to your own playlist.
Remember, cleanings are generally painless; any minor discomfort is temporary. The Cleveland Clinic notes that if anxiety is an issue, letting your dentist know helps ensure a comfortable experience. Southside Dental’s compassionate staff will work with you to make the cleaning as smooth and pain-free as possible.
Post-Cleaning Expectations
After a thorough cleaning, you’ll likely notice: – Smooth, clean teeth: The “cleanest” feeling ever! Teeth often feel extra smooth to the tongue.
– Temporarily sensitive teeth: You may experience sensitivity to cold or sweet for a day or two. This is normal as enamel is freshly exposed; sensitivity usually fades quickly.
– Minor gum soreness: Gums may feel tender or even bleed slightly when you brush or floss for a short time afterward. This is normal healing from having tartar removed. Keep flossing gently – this actually helps gums stay healthy.
Use a soft toothbrush and lukewarm water for 24 hours if sensitive. Over-the-counter pain relievers like ibuprofen or acetaminophen can relieve any discomfort. If you received fluoride treatment, your hygienist might advise avoiding eating or drinking (especially staining liquids) for at least 30 minutes. Otherwise, you may resume your normal diet right away.
Contact the dentist if you have sharp or worsening pain, or gums that bleed heavily or for more than a couple of days. Otherwise, enjoy your fresh, clean smile – and don’t forget to schedule your next cleaning at Southside Dental (Petersburg) in about six months!
Frequently Asked Questions (FAQ)
Dental Cleaning: Everything You Need to Know
🪥 What happens during a routine dental cleaning?
During a cleaning, a hygienist performs a full oral exam, removes plaque and tartar (scaling), polishes your teeth with special paste, and applies fluoride. It’s a gentle process aimed at preventing cavities and gum disease.
✨ Does a teeth cleaning hurt?
For most, it is painless. You may feel slight vibrations or hear scraping, but it shouldn’t hurt. If you’re uncomfortable, tell the hygienist—they can adjust or use a numbing gel. Minor sensitivity afterward is normal and passes quickly.
⏳ How long does it take?
Most cleanings last between 30 and 60 minutes, depending on tartar buildup and if X-rays are needed.
📅 How often?
The standard is every 6 months. However, those with gum disease may need visits 3–4 times a year.
💰 What is the cost in Petersburg, VA?
Without insurance, prices typically range from $75 to $200. Most insurance plans cover preventive cleanings at 100%, meaning patients often pay $0 out of pocket.
🔍 Regular vs. Deep Cleaning?
Regular cleaning is for healthy gums and cleans above the gumline. Deep cleaning (scaling and root planing) is needed for gum disease; it cleans below the gumline and often requires local anesthetic.
✅ What to do after your appointment?
Maintain hygiene with gentle brushing and flossing. Avoid very hot, cold, or crunchy foods for a day if your gums are tender. Enjoy the feeling of a smoother, fresher mouth!
Sources: Cleveland Clinic (Dental Cleaning guide); American Dental Association (MouthHealthy: Scaling & Root Planing); Centers for Disease Control (Oral Health recommendations); Aflac (dental cost guide); Southside Dental Cares – Gum Care page; Southside Dental Cares – Cavity Prevention page.